| Adding
Foot Strap Inserts - the Basics |
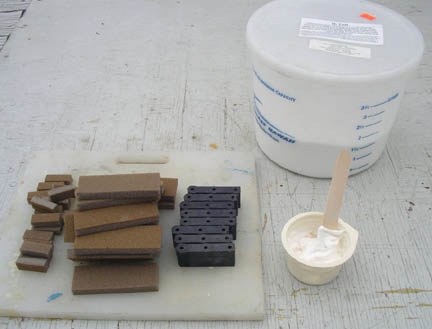 |
The Bits: Chinook 5-hole
inserts cut down to the desired (in this case) 3-hole size. Bits of 3/8"
Divinycell cut to size (cuts easily with utility knife). Paste of Epoxy
thickened with Q-Cells to hold it all together. |
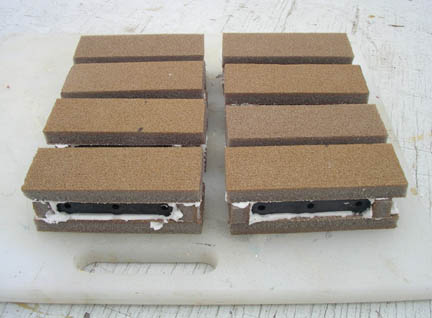 |
The fun begins: think of
this as making sandwiches - "butter up" the slabs of
Divinycell, squoosh in the insert as "filling", butter up more bits of
Divinycell to complete the assembly. |
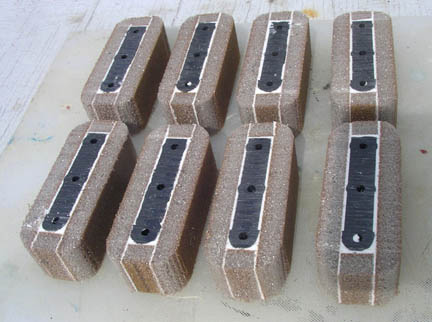 |
After the "sandwiches" have
cured, they need to be trimmed nicely to facilitate installation. Easiest
way to get things square is to use a bandsaw, bench grinder, or both. |
 |
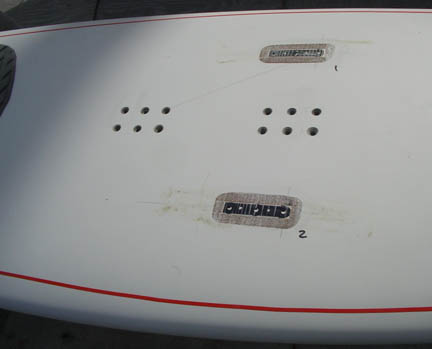
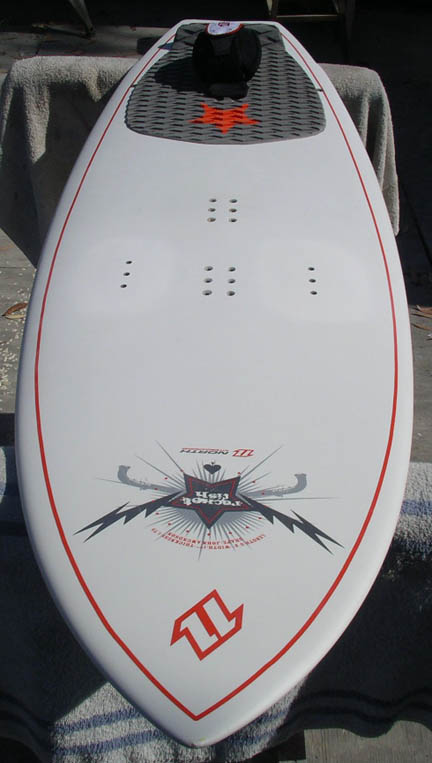
Mark the insert locations
(hole spacing anywhere from 6 1/4" for small feet, to 7" for big ones with
booties). The Pleskunas guide is one of the
handiest tools to have around the shop! I get mine from Fiberglass Hawaii. |
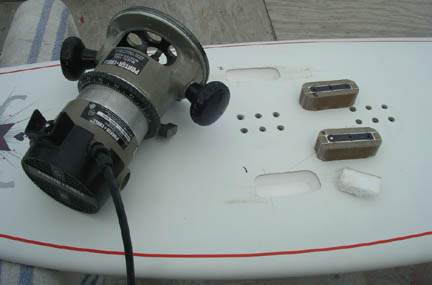 |
Mark the inserts (since they
are handmade, they are all slightly different, so they need to be numbered,
and their orientation noted!). Cut the holes for the inserts with a router
set to just a smidge deeper than the depth of the inserts (1" for the
Chinooks), to allow for the Epoxy paste. |
 |
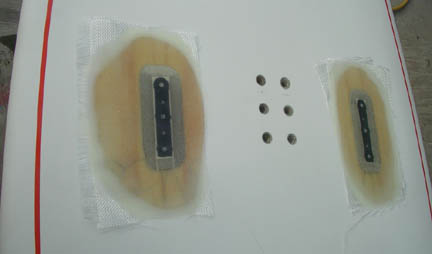
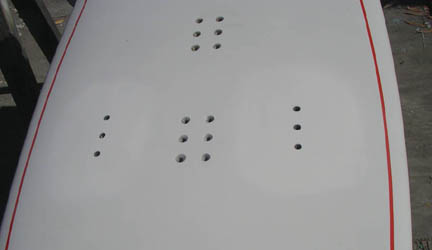
Mix a paste of very slow
Epoxy with Q-Cells, slather the cavities, as well as the inserts all around,
then slowly press the inserts in place. If you
cut the perimeter of the holes to close tolerances, it helps matters along
if you drill small holes between the screw posts to allow excess Epoxy to
escape (which is why the 3-hole inserts in the pictures suddenly appear to
have 5 holes) |
 |
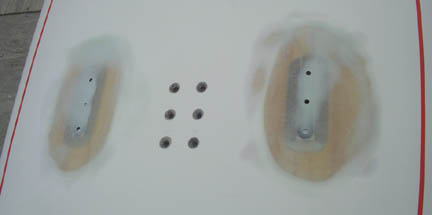
Trim the inserts flush, then
grind away the original paint etc for about 1 1/2" all around the new
inserts. Glass over the whole area with at least (3) layers of 4oz cloth. |
 |
Grind the cloth nicely, fill
whatever divets plus the cloth weave with an Epoxy paste. |
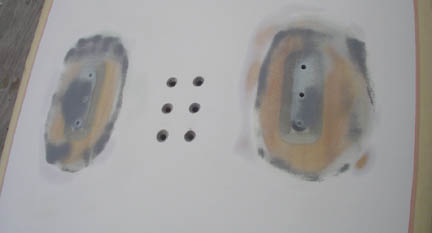 |
Sand the Epoxy paste nice
and smooth, drill out the screw holes before they disappear from sight
forever!, then apply an Epoxy primer, just to make sure. Let cure, sand to
220 grit. Dust off, then tape off and mask off
anything within 3 feet. |
 |
Apply paint - after going
through all this trouble, I like to put on a good paint that will last for a
while without blistering, flaking, and otherwise giving up the ghost
prematurely. With paint, you get what you pay
for. Don't be stingy here!! |
 |
Pull tape and masking film
just after the paint has tacked, then let cure thoroughly, at least 24hrs.
Then feather out the paint edges with successively finer wet & dry
sandpaper, such as 400, 600 and 1200grit. For a satin finish such as this
kiteboard, finish with a Scotch "Purple Pad".
Clean up the new insert screw holes and chamfer the edges.
For the Chinook inserts shown, use #10 sheet metal
screws or PT screws to start. Once things have been used a while and gotten
a bit sloppy, you can step up to a #12 size.
Since the inserts are exactly 1" deep, you can in
most cases safely use a 1" long screw, since the foot strap thickness, plus
washer and anti-twist thingies mean that only about 7/8" of the 1" screw
length actually protrudes into the insert.
Never ever use a screw that goes deeper than 1",
since you would create a leak into the EPS core!! |
|
return to Repair Menu |