|
| |
| Softop Buckle |
|
| Under normal conditions,
with the rider's weight pushing down more or less in the middle of the
board, and the water pushing up more or less evenly across the bottom, a
board will flex a bit, with the bottom in tension, and the deck in
compression. As critical loads are reached in this mode, the deck will fail
first, since most materials - fiberglass, Carbon, Kevlar etc etc - are
only about half as strong in compression, as they are in tension.
Generally, the deck reinforcements will buckle, most
often up (peel strength of glass to EPS low), but sometimes down
(compressive strength of EPS low). Generally, the edges of the EPS core will
be compressed beyond their elastic limit, unable to recover.
A typical Softop buckle repair, then, will require
removal of delaminated reinforcements, some filling of the core, as well as
rebuilding the structure and dealing with the EVA foam pad. |
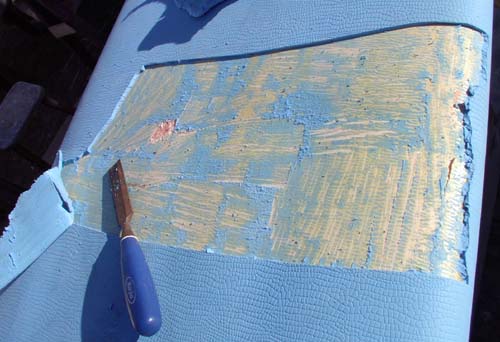 |
One of the milder buckles to come to me,
with only slight displacement upwards of the skin, and some tearing on both
rails. Cut away enough EVA foam, to allow a
generous amount of overlap for the new fiberglass.
Utility knife, single-edged razor, and sharp chisel
will take off the EVA faster and cleaner then the grinder!
Notice the marked deck depressions from knee
paddling! Notice also the tear on the starboard rail, which appears to have
precipitated this buckle. Some previous impact with a sharp-edged object? |
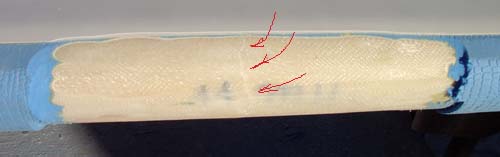 |
Follow the crack with the grinder to its
very end - no point whatever to slap new fiberglass over broken stuff. If
the repair is to be fair, the new material must REPLACE the broken, NOT be
added over it! |
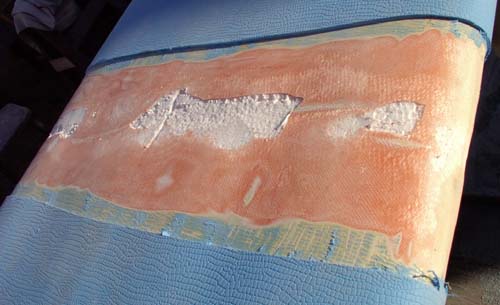 |
The fiberglass is bevelled on both sides
of the buckle, and all loose material removed, including the little glass
stringers intended to stiffen the deck. Glass
weight is approx 20oz for this 11fter, so I will put (5) layers of 4oz cloth
back. |
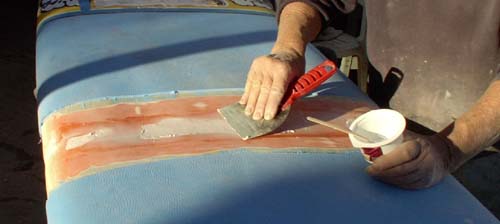 |
But first, the substrate needs to be
filled - this a toothpaste-consistency batch of slow Epoxy w/ Q-Cells and
Cabosil, well worked into the voids, to glue down the edges of the old
laminations. Wallpaper knives make good putty
knives! |
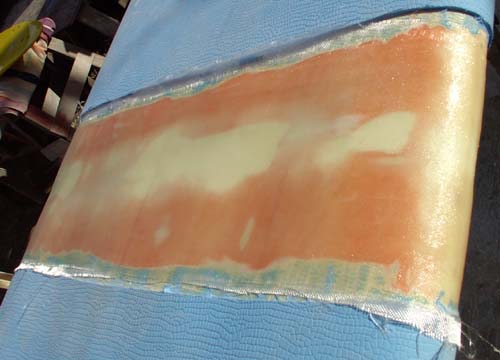 |
Five layers of 4oz cloth in 105/205 West
System Epoxy, with the innermost layer just spanning the delam'd area plus
3/4inch, the next another 3/4" wider, etc etc. Everything well squeegeed,
until it becomes perfectly clear and thereby signals an absence of voids and
air bubbles. To duplicate the factory laminate
schedule, I added (4) strips of glass on each rail, staggered by 3/4" each.
|
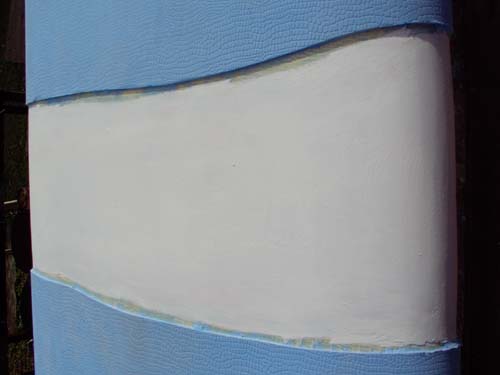 |
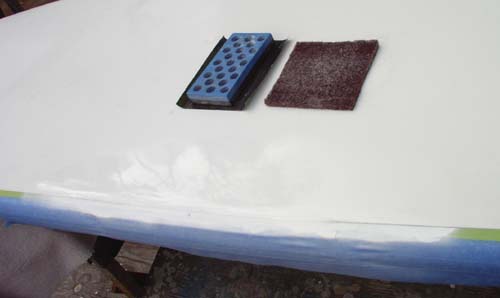
Glass ground, faired with VC Watertight
Epoxy fairing compound, sanded, and coated with Z-Spar high-build Epoxy
primer. In preparation for the new bit of EVA
foam, the edges of the cut-out need to be trimmed true and parallel.
I cut the new piece of EVA at least 2" longer than it
measures, and 1/8" wider for a 12" wide strip such as this. The extra width
forces the edges together and seems to make them stay tight longer. |
 |
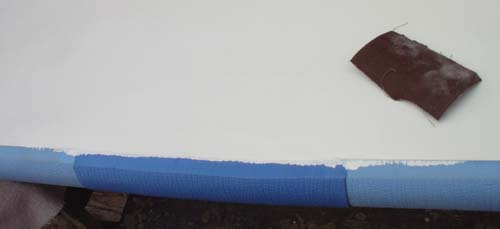
Once installed with contact cement, I
put a fresh blade into the utility knife and trim the edges of the new strip
of EVA to within 1/8" or so of its final shape. |
 |
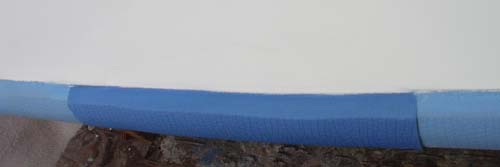
Then, with the disk sander and 80grit
paper, I finish-trim the edge of the EVA. The secret to success here is to
place the sander so that the disk rotates TOWARDS the board, and not away
from it - which would tear the EVA off, guaranteed! |
 |
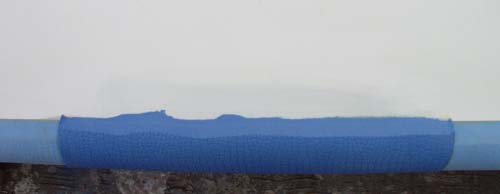
Edges of freshly trimmed EVA all taped
off, sanded, and coated with LP. Allowed to cure overnight.
To match the matte appearance of the rest of the bottom,
I sand it with 400grit wet & dry paper, then finish by rubbing with a Scotch
"Purple Pad" |
 |
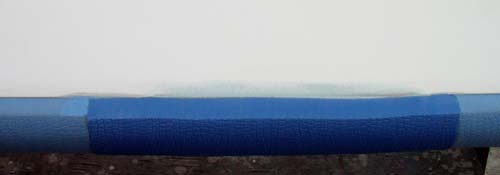
Off comes the tape - and, sure enough,
with the surface of the EVA quite porous, some paint ran beneath the
tape.... Sand gently with sharp 80grit
sandpaper to clean up. |
 |
Edges all done. |
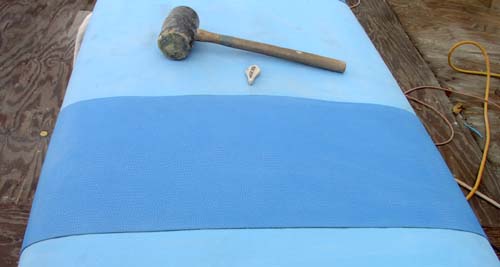 |
Hit edges all around with a mallet, to set the
contact cement. Clean up pencil marks and stray
blobs of contact cement with a soft eraser.
Hi, Tom :) |
|
return
to Repair Menu |
|